I had a request on a Ravelry board for photos showing how I was pulling out the loop for my Barn Raising square (it's for a Doctors Without Borders fundraiser, see here for details) and I thought it might be good to post here, too. My needle has a light blue cable, which is a little hard to see.
Here's the rundown:
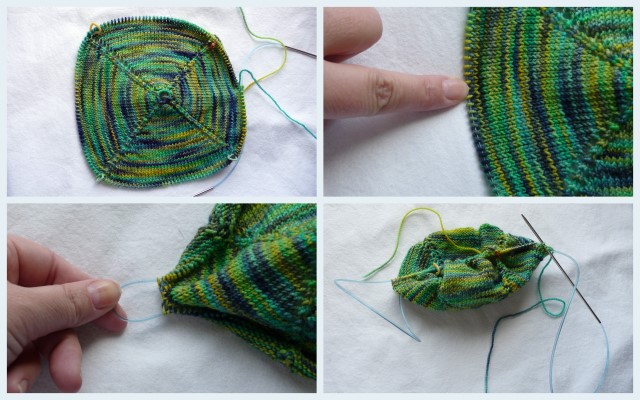
Top Row, Left: No loop--needles are in the middle of the right vertical side. This is the beginning of the round (within a stitch or two), because the first marker is the red circle. The other markers are yellow or green hearts.
Top Row, Right: I'm pointing at the mid point of the left vertical side. This is where I'm going to pull out the loop. It's not important that the loop is exactly halfway, I didn't count or anything.
Bottom Row, Left: I'm pulling out the loop, without making a hard crease in the cable or stretching out the stitches too much.
Bottom Row, Right: Once the loop is pulled out, scrunch up the stitches onto each needle. With the work facing you, pull the left needle out far enough so that you can start knitting the stitches on the right needle. If you have too many stitches, or don't scrunch them up enough, they will catch on the join and you will have to push them up again. If your cable is long enough, you can pull out another loop (divide the stitches roughly into thirds). I tried this for awhile with this squre, but my needle is really too short for that so I've gone back to one loop and it's been fine.
I'm on the last round of this square, and I've started another square on dpns so I can jump right into another one!


No comments:
Post a Comment